Home / Real estate photography guide
Real estate photography: everything you need to know.
Real estate photography is shooting a home so the listing can go live: level, bright, wide but not distorted, delivered the next morning in the order the agent uploads it. The settings fit on one line: f/8, ISO 400 or lower, five brackets 2.0 EV apart, 16-17 mm on full frame, tripod level at about light-switch height. Outside it’s 24 mm and one exposure. The rest of this page is everything around that line, in the order your first shoot actually happens.
Get the Camera Settings Card, free.
Both sides of the card from this guide: interiors on a tripod, exteriors and the hero shot. Print it, or keep the phone version on your lock screen. It comes by email.
Sent. Check your inbox for the email from Julian. Want it now? Open the card, or save the phone version.
What the job is, and who pays for it.
You photograph homes that are for sale or for rent. Interiors, exteriors, often a few aerials, sometimes a twilight. You edit them, then deliver them in a form the listing agent can upload without touching.
The customer is usually the listing agent. She isn’t buying files. She’s buying a listing that goes live on time and makes her look like the right choice to her seller. That’s why the clock and the delivery matter as much as the pictures, and why this guide spends real time on both.
Agents aren’t the only buyers. Landlords, short-term rental hosts and builders pay for real estate photos too, and they have no seller to impress, just a unit sitting empty.
If you’re wondering whether software is about to take the job: AI takes the editing, not the appointment. Sky swaps and virtual staging are getting cheap. Someone at the door at 10 a.m. with a tripod while the seller watches is not.
The gear: what to buy once.
You don’t need much. You need the right few things, and the rule for those is short: buy nice or cry twice. Cards, batteries, the tripod and the bag are never the cheap stuff, because each one can end a shoot.
Camera
Any body that shoots RAW and brackets at least five frames on its own. The agent never asks what camera you used. The minimum gear to start is less than you think. Julian shoots stills on a Sony a7R III, video on a Sony FX3 and aerials on a DJI Mavic 3 Pro, but none of that is the entry ticket.
Lens
The lens picks your system, so pick it first. You want an ultra-wide zoom that reaches 16-17 mm on full frame, about 10-11 mm on a crop sensor. Nothing wider: past that, barrel distortion starts to look like a fisheye and the rooms stop looking like rooms. Never a fisheye lens.
The free gear list names one used starter kit per system: a Sony a6400 with the Sony E 10-18mm f/4, a Canon 80D with the EF-S 10-22mm, or a Nikon D7500 with the AF-P DX 10-20mm. Get the gear list here, with used prices and the reasons. Some links on it are affiliate links, and it says so.
Tripod and a geared head
Every interior frame is on a tripod, because a bracket only blends if the camera doesn’t move between frames. Tall legs matter in kitchens, and a geared head makes the tiny level moves that keep verticals straight. The list’s picks: Benro Mach3 TMA38CL carbon legs (69.7 in. tall), stepping up to a Gitzo Mountaineer GT2542, with a Benro GD3WH geared head or a Leofoto G4 Pro.
Remote trigger
Use the 2-second timer or a remote. Never press the shutter by hand.
Cards, batteries, bag
- Cards: two of them, so you have a copy before you format anything. The list names the SanDisk Extreme PRO 128GB V30.
- Batteries: two or three spares from the camera maker, not no-name ones. One in the camera, one charging, one in your pocket.
- Bag: everything in one bag you can carry through a house. The list names the Lowepro ProTactic BP 350 AW II, or a Pelican 1510 case once the kit gets heavy.
Flash, triggers, modifiers and stands
Most guides put a flash, a flash trigger, modifiers and light stands on the shopping list. To start, leave the flash at home: no flash in your photos. Bracket and blend instead (the editing section shows how). Flambient, which adds a flash frame, is a later step once the basics are solid, so you can skip the trigger, modifiers and stands for now.
Before the shoot.
The standard shot list
Every room gets at least four angles, and you decide that once, so you never get the reshoot call. Small bathrooms are the exception at two. Outside, you shoot the front, all four corners, the back, the yard and anything the owner invested in: a deck, a pool, a fire pit. The Shoot-Day Checklist has the whole list room by room on one printable page.
Prepare the house, not just the camera
- Confirm access and the shoot time with the agent.
- Ask the owner to tidy and declutter every room and the yard before you arrive. The Home Preparation Checklist is the sheet to send the seller the day the shoot is booked.
- Know which way the house faces before you pick the time. You want the sun behind you on the front, not in the lens.
- Charge every battery and empty every card the night before.
Insurance and paperwork
This part is general information, not legal or insurance advice. The U.S. Small Business Administration describes general liability insurance as coverage for bodily injury, property damage and lawsuits, for any business. In practice a brokerage may ask for a certificate of insurance before it puts you on its vendor list, so buy what the vendor form asks for, and ask a local insurance agent about gear and drone cover. Rules vary by state.
Two more questions come up early. Do you need an LLC first? Not before your first shoot; a local attorney can tell you how it works in your state. And who owns the photos? Under U.S. law, copyright exists from the moment the work is created, so the photographer usually holds it and the agent gets a license to use the set for her listing. Put one license line in your order terms so a relist becomes a sale, not a fight.
Camera settings for interiors.
Set the camera once at the door. Between the frames of a bracket only the shutter changes; aperture and ISO stay put. This is side one of the Camera Settings Card, word for word where it matters.
- Mode
- Aperture priority (or manual)
- Aperture
- f/8. Stay between f/7.1 and f/11.
- ISO
- 400 max. Lower when the room allows (100 is cleanest).
- Shutter
- Set by the meter. You’re on a tripod, so it can be as slow as the room needs.
- Brackets
- 5 frames, 2.0 EV apart, continuous bracket. A high-contrast room (big windows) gets a second set exposed for the windows.
- Focal length
- 16-17 mm on full frame (about 10-11 mm on crop). Nothing wider.
- Focus
- Expand Spot (the Sony name)
- Steady Shot
- Off on the tripod
- Release
- The 2-second timer or a remote
- White balance
- Auto. Set it by hand only in mixed light.
- Files
- RAW
Aperture, ISO, bracketing and focal length work the same on Sony, Canon and Nikon. Only the menu names change.
The card is two sides, interiors and exteriors, plus a phone version for your lock screen. The box below sends it to you.
At the house, room by room.
Declutter and stage before the first frame
- Every light on: interior, exterior, accent, under-cabinet, appliance. Fans and TVs off, because they blur and reflect.
- Curtains and blinds open. Daylight in, the view visible.
- Toilet lids down. Counters, islands and tables cleared. Interior doors open so the house flows.
- Cars, bins, hoses, cables, chargers and pet things out of sight.
- Pillows fluffed, chairs straight, rugs aligned, beds made.
- Never touch the client’s things without asking.
Walk the whole house once before you set up. You’ll find the room that needs the most work and the order that saves you from carrying the tripod back and forth.
Lights on or off
On. Every one of them, every time: interior, exterior, accent, under-cabinet and appliance lights. Turn on gas fireplaces too, if there are any.
Height and level: shoot straight
Set the tripod height by the furniture, not a number. Start around light-switch height, about 4 to 4.5 feet, then adjust. Level the camera and move it up and down like an elevator. Never tilt it. A tilted camera makes the walls lean, and vertical lines should be truly vertical.
Get three walls in the frame where you can. No people and no pets in any frame.
Living room
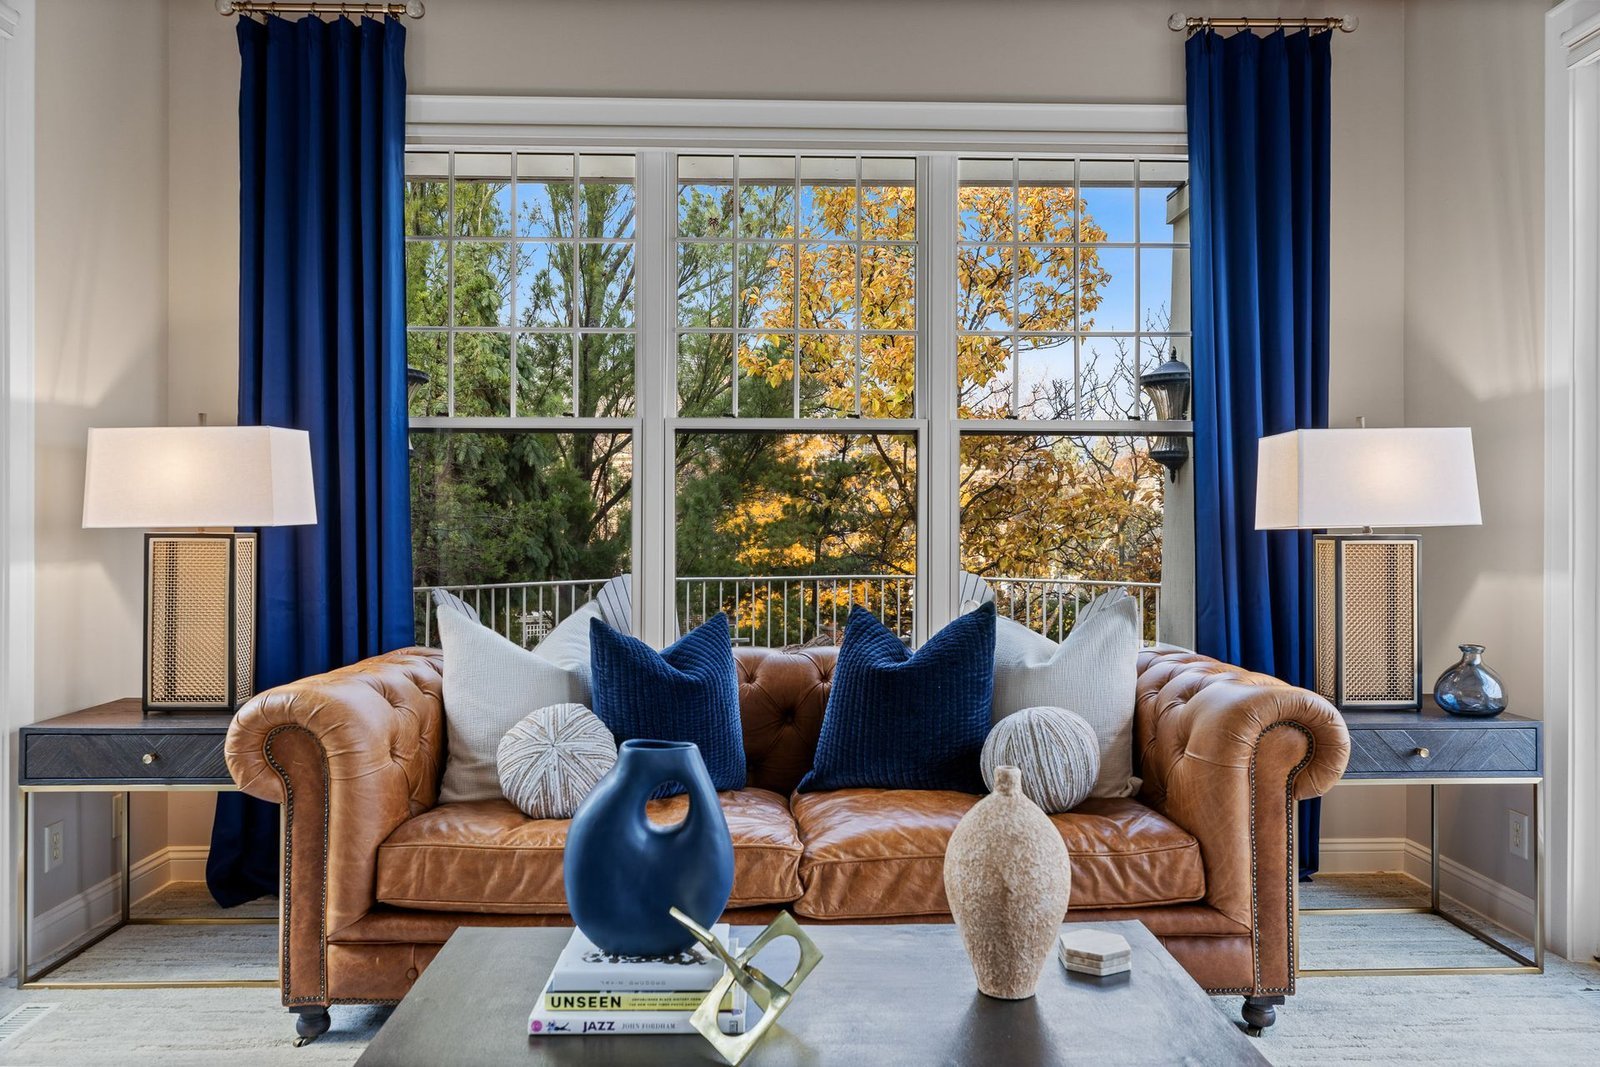
Four or more wide angles: the main view, a corner, and the transition to the next room. Feature the fireplace if there is one. Watch the symmetry and the furniture arrangement.
Kitchen
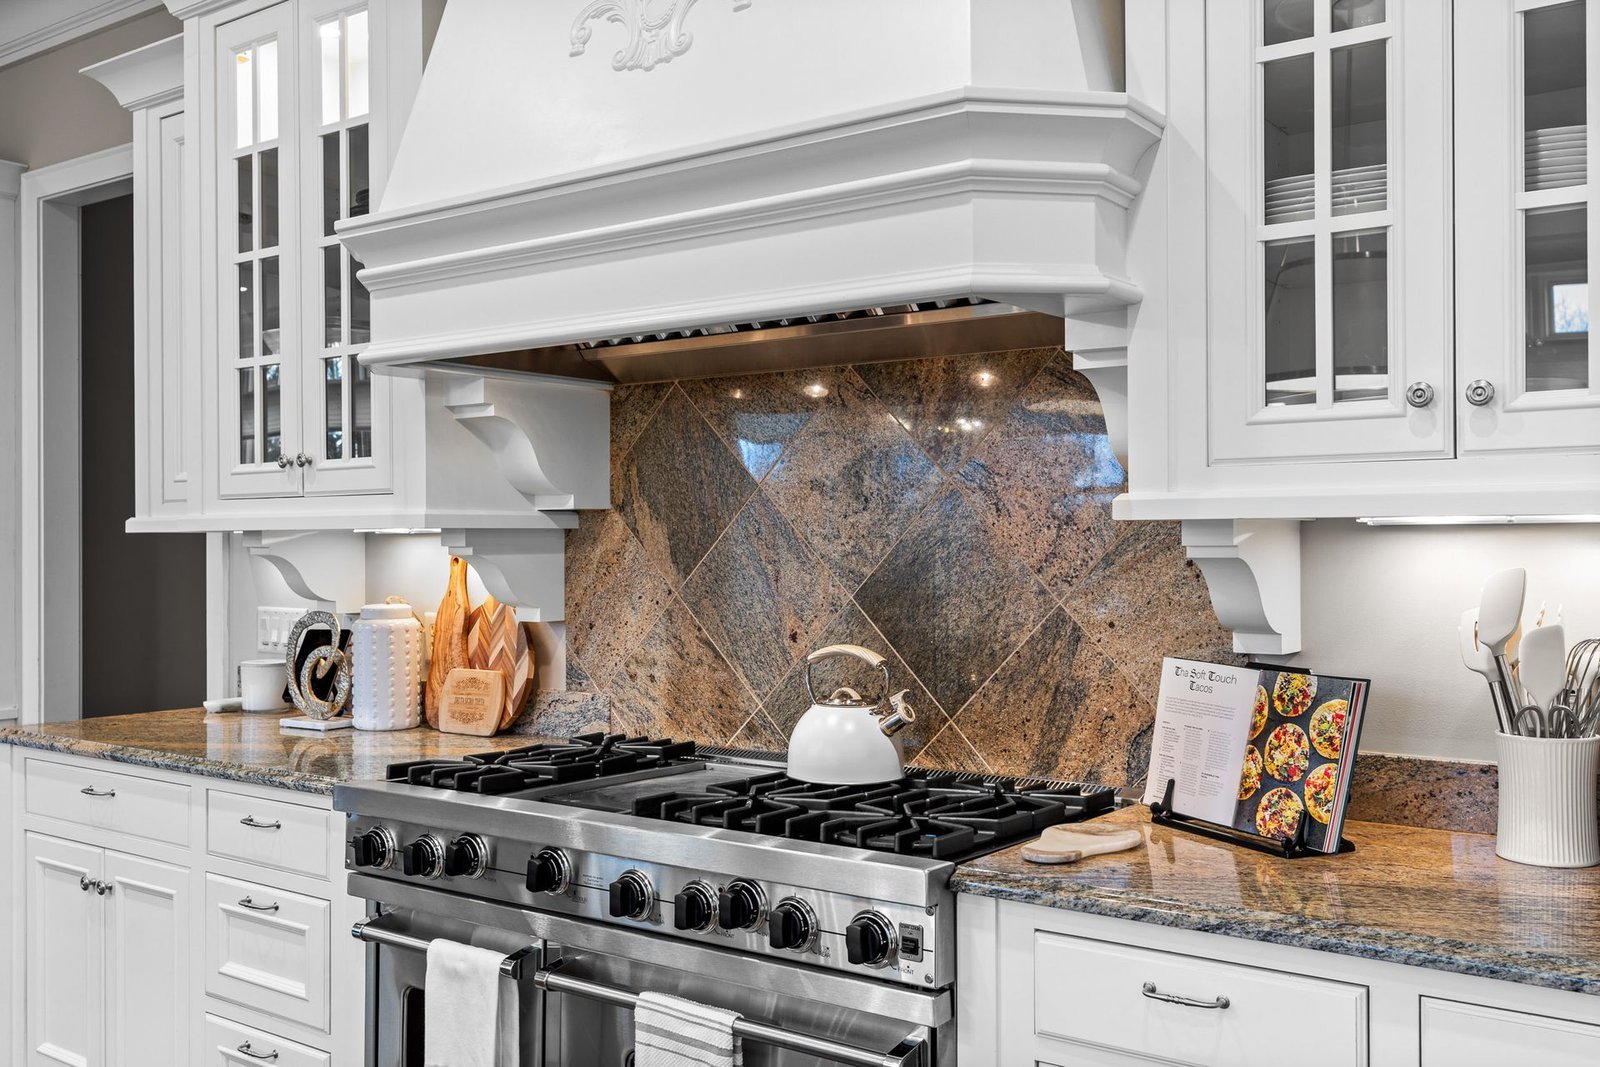
Raise the tripod until you can’t see the undersides of the cabinets. If you can see them, it’s too low, so extend all three legs fully. Shoot two to three wide angles plus a detail: the island, the range and hood, a feature appliance, the backsplash. Counters clear, fridge magnets gone.
Bedrooms
Bed made, pillows uniform, curtains open, cords hidden. Two to four angles. Don’t shoot into the wardrobe.
Bathrooms
Set the tripod just above the vanity, so you see the tile, the toilet and the vanity top; less ceiling is fine. Lids down, trash and small toiletries gone, towels hung, mirror spotless. Two angles for a small bath, three or more for a big one. Angle away from a toilet in the center of the frame, and lead with the vanity or the shower.
Dining, halls, office, laundry
Dining: chairs aligned, one small centerpiece or none, two wide angles. Halls and entry: shoes and mail gone, shoot the transition into the main space. Office or den: one wide, one detail. Laundry, mudroom and garage only if they’re a selling point.
Windows and mixed light
Windows are where a bracket earns its keep. Review the brightest frame of each bracket on the back of the camera: if the room is still dark or the view is gone, shoot a second set exposed for the windows. Mixed light, daylight from the windows and warm bulbs inside, is the one time to set white balance by hand. The rest gets fixed at the desk, room by room.
Reflections and glare
Mirrors, framed art, TVs, oven and microwave doors and shower glass will all show you and the tripod. Move until they don’t, or until the reflection is small enough to remove later. Check every room for reflections, glare and stray items before you leave it.
Before you wrap
Review every shot on the camera. Blurry or missing frames are found here, not at the editing desk. Count your brackets: every set should have all five. Then close up like a pro: lights off, everything packed properly, lockbox scrambled, doors locked.
And if the agent or the seller stays in the house while you shoot, that’s fine. The agent watching you is the person who books your next shoot.
Exteriors and twilight.
Outside, everything gets tighter and simpler. This is side two of the card.
- Focal length
- 24 mm (24-35 mm is the sweet spot). Tighter than inside, so the house doesn’t lean.
- Exposures
- One exposure. Bracket only when the light is harsh: hard sun on the house, or a sky that’s blowing out.
- ISO
- 100
- Aperture
- f/8 (f/7.1-f/11)
- Exposure
- Slightly under, to protect the highlights in the sky.
The hero shot
Walk in a straight line out from the front door, then turn around. Raise the tripod as high as it goes, keep the camera level and parallel to the house, and get the whole house in the frame. That’s the cover photo. Wide lenses make the house look like a toy, so it’s 24 mm here, never 16.
The rest of the exterior list
- The four corners, and the back
- Deck, patio, pool, fire pit
- The garage
- Entrance close-ups: the door, and the house number only if the agent wants it
- The view from the front door, looking out
- Whatever the owner invested in
Before you shoot outside: cars, tools and hoses gone, paths swept, outdoor furniture staged.
Time of day
Know the cardinal direction of the house before you book the time, so the sun is behind you, not in the lens. If you’re stuck at 1 p.m. with the sun in the lens, bring something to block it.
Twilight
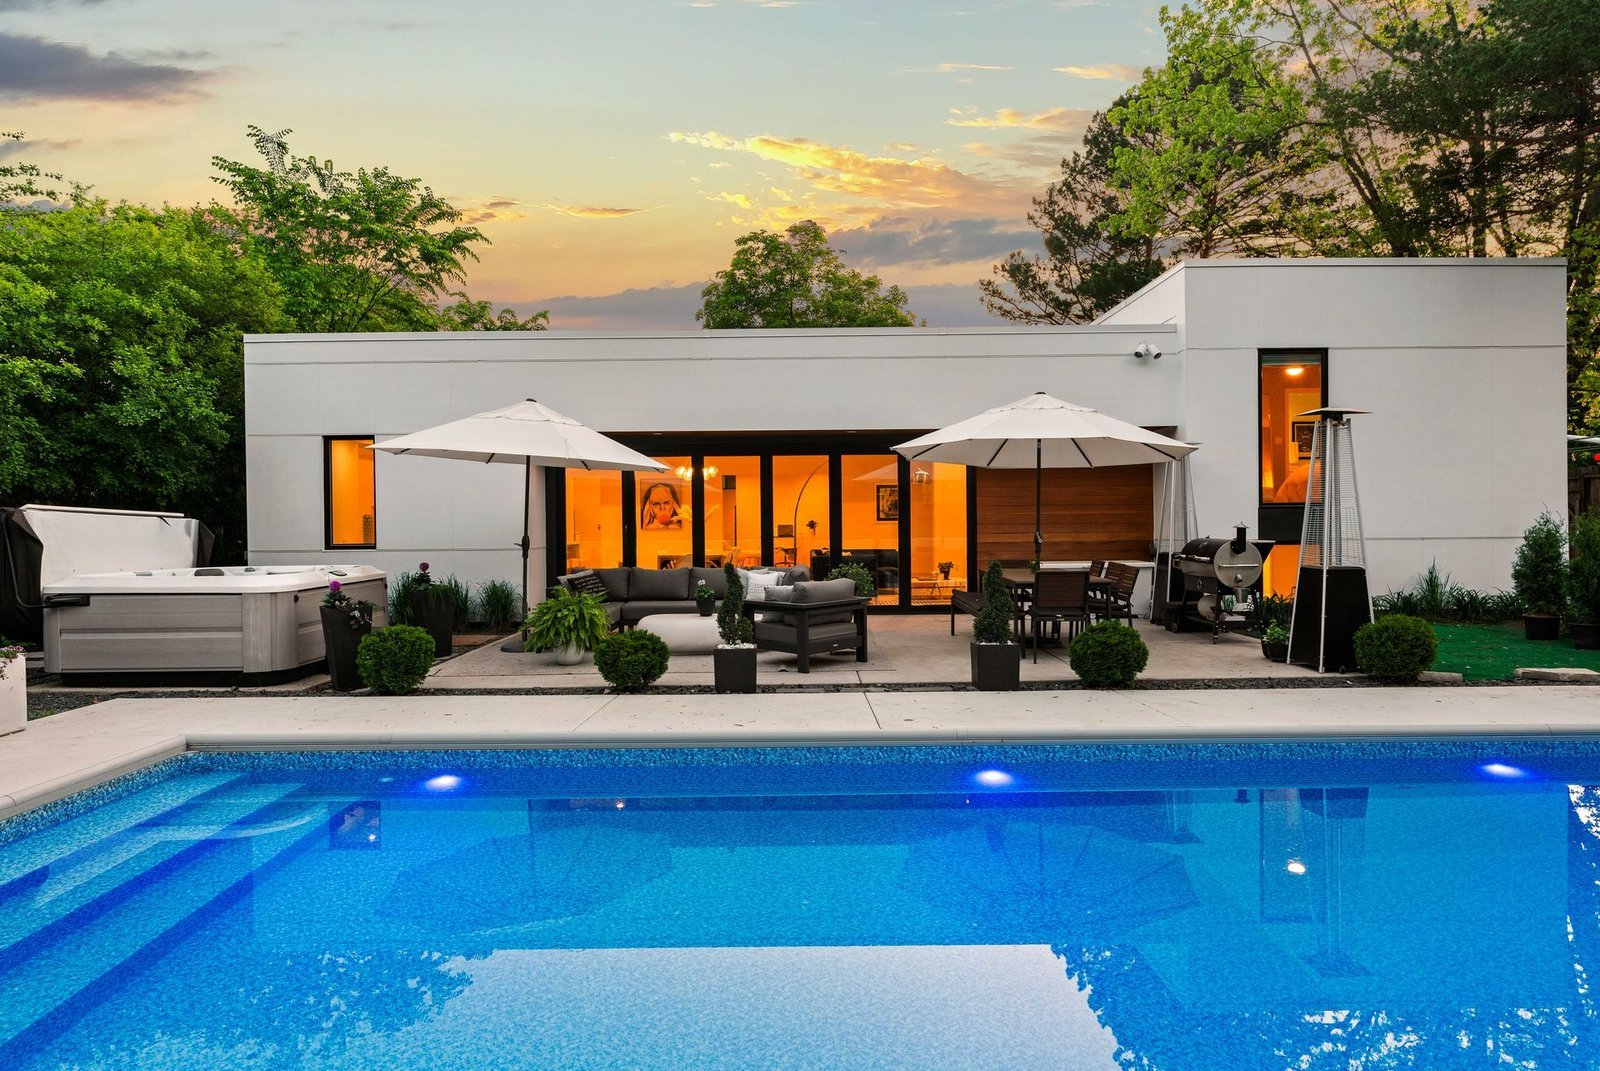
Shoot twilight only when it’s ordered; on the example sheet further down it sits in the top package. Shoot it 20 to 30 minutes after sunset, with every interior light on, so the windows glow against a blue sky. Shoot it on the tripod as a bracket and blend it in the edit.
Drone: the FAA rules first.
In the United States, a paid real estate drone shoot is flying for work, and the FAA requires a Remote Pilot Certificate under Part 107 to fly for work or business. Here is what the FAA’s own pages say, checked November 18, 2026:
- The certificate. You must be at least 16, able to read, speak, write and understand English, and pass the initial knowledge exam, “Unmanned Aircraft General, Small (UAG),” at an FAA-approved testing center. FAA: Become a Certificated Remote Pilot.
- Staying current. Certificate holders complete online recurrent training every 24 calendar months (same FAA page).
- Registration. Every drone you fly under Part 107 is registered: $5 per drone, valid for three years. FAA: How to Register Your Drone.
- Altitude and sight. Maximum 400 feet above the ground, higher only within 400 feet of a structure, and the drone stays within your sight. FAA: Part 107 highlights.
- Airspace and night. Near airports you need an airspace authorization, and twilight or night flights have their own requirements. FAA: Certificated Remote Pilots.
That’s a summary, not the rule book. Read the FAA pages before you fly. Outside the US, look up your own country’s rules.
What to shoot from the air
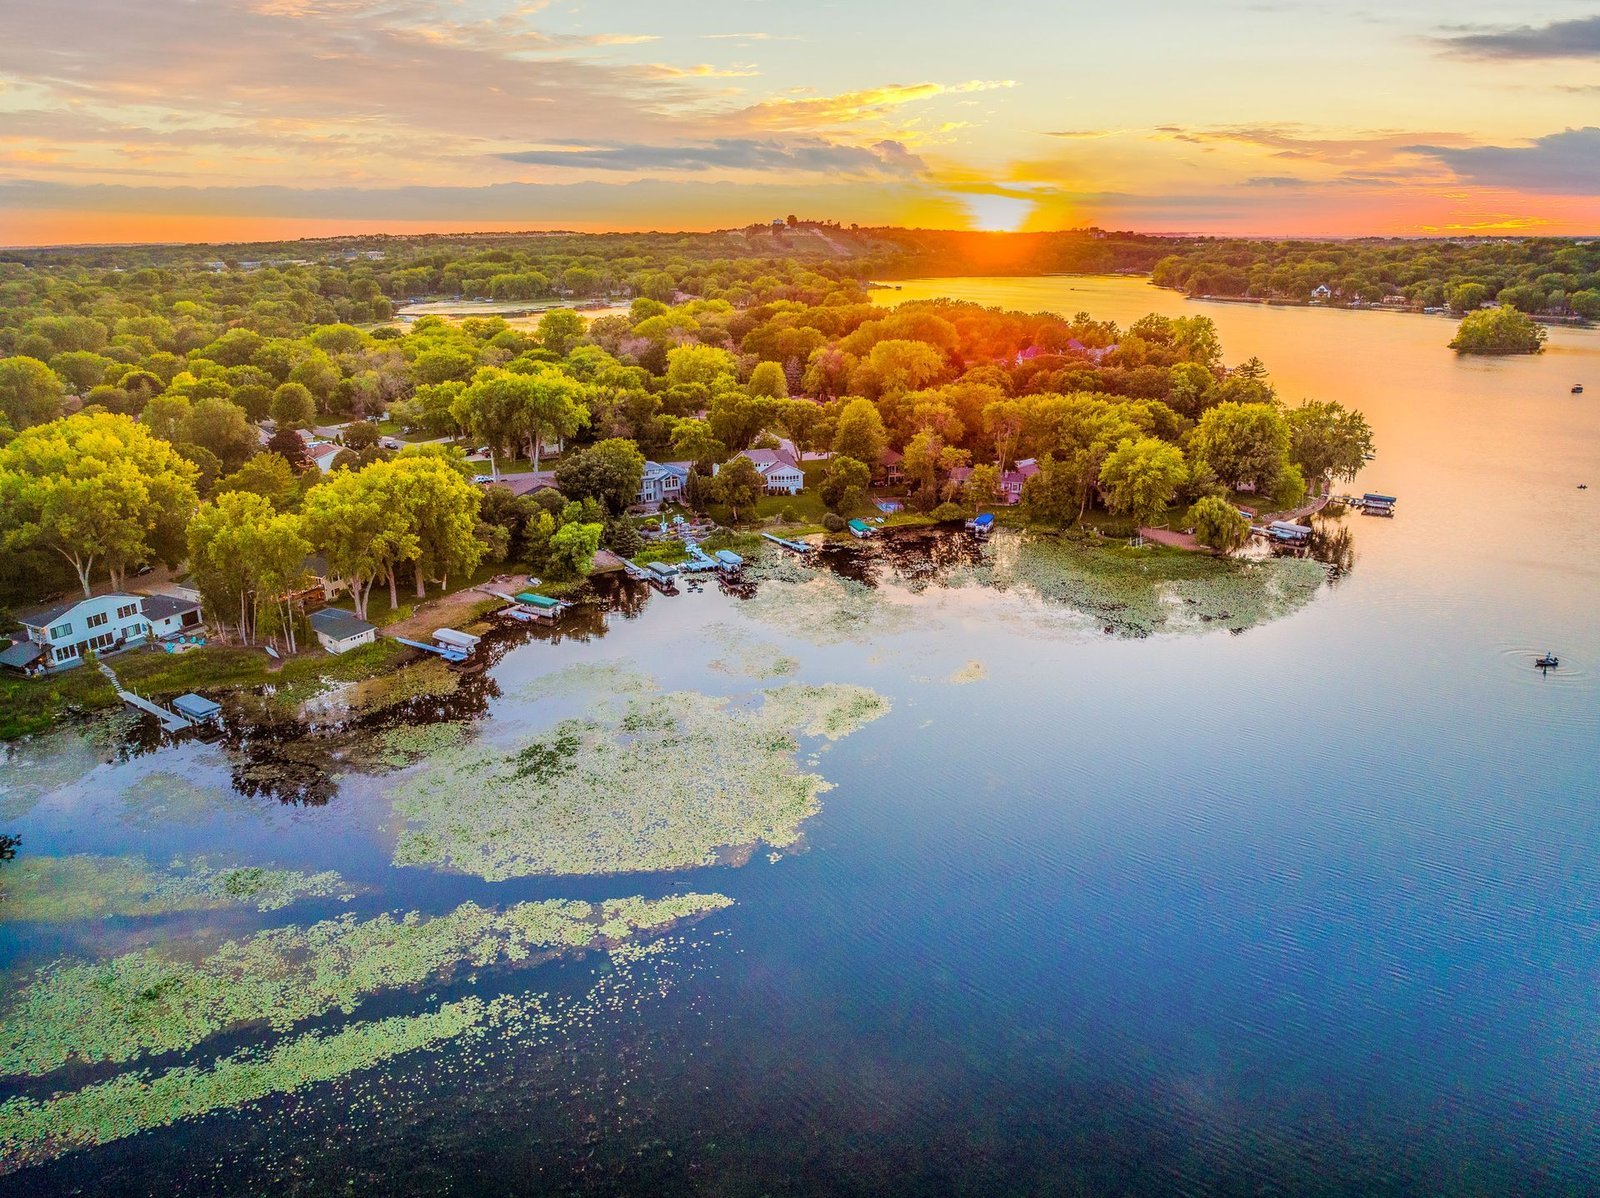
A pull-back that shows the lot, where it sits on the street and what’s around it. Five shots is usually enough. Skip the straight-down shot of the roof unless the roof is the feature, like solar panels.
No license yet?
You don’t have to stop booking while you study. Count the drone gap in your market first: open 20 new listings near you and see how many have aerials. If agents ask for drone before you’re certified, hire a pilot who holds a Part 107 certificate, see the certificate, and ask your insurance agent whether your policy covers a hired pilot.
Editing: blending, glare, flambient and HDR.
Real estate photography is half post. The shoot gets you the frames; the edit is where they turn into something an agent can put her name on.
HDR and blending
HDR means you bracket exposures on site and blend them in software, so the dark corners and the bright windows both hold detail. It’s cheap, it needs no extra gear and it’s fast to learn. It can look fake if you push it. Blending is the hand-finished version: you take the best parts of each bracket, often a separate window frame, and mask them together so the view through the glass looks real.
Flambient
Flambient mixes a flash frame with the ambient light. It looks more natural and has a higher ceiling, but it needs a speedlight and a trigger and takes longer to learn. Treat it as a later step. Start with bracket and blend, the method on this page.
The order that saves rework
- Back up the RAW files: one copy on your disk, one in the cloud.
- Cull. Reject blur, gear in the frame and duplicates first.
- Set white balance globally, then adjust by room.
- Apply lens correction to the batch before you straighten. Straightening first creates rework.
- Straighten verticals and horizontals image by image. Don’t trust auto-straighten across a batch.
- Sharpen, then reduce noise, at 100% zoom.
- Window pulls and blending, sky, object removal, reflections.
- Check the whole gallery for consistency, then export.
Lens correction and basic adjustments
Turn on the lens profile and chromatic aberration removal on every image. In Lightroom terms, the starting point for a standard interior is a small lift in exposure, highlights pulled down hard and shadows opened up. The Photo Editing Workflow has the exact slider values for each kind of room, and the reasons.
Mixed light temperatures
Daylight from the windows reads blue next to warm bulbs. Set one base white balance for the whole set, then fine-tune only the rooms that need it, so the kitchen doesn’t look a different color from the hall. For a mixed-light room the workflow starts around 4500-5500K.
Glare and reflections
On exteriors, a circular polarizer cuts glare on windows and water. Take it off for wide interior brackets. In the edit, remove any reflection of you or the tripod in mirrors, glass, TVs and appliances, and check the corners of every frame at 100% for a tripod leg.
Skies, lawns and honest edits
A replaced sky must match the direction of the shadows on the ground. Grass should look healthy, not neon. Remove the pool cleaner. Then stop. Changing what a buyer will walk up to, like walls, floors, the lawn or the view, is a different matter: some states and MLSs now require altered photos to be labeled, with the original shown next to them. Read what you have to disclose for AI and virtual staging, and check your own MLS.
Doing it yourself, or not
Edit your own until it caps your shoots or pushes your delivery late. Then outsourcing is about fifty cents a photo. Before you hand it off, write down your standard: the Photography QC and Delivery SOP is the one Cineminn checks every gallery against.
Delivery: the part agents remember.
Most photos are fine. Delivery is why she books you again, or doesn’t. The delivery checklist (PDF) is five things:
- Delivered in 24 hours. Shoot today, deliver tomorrow. Can’t do it this week? Say so when she books, not after.
- MLS-sized JPEGs, numbered in walk order. 01, 02, 03, in the order she uploads them: front exterior, front door, living, kitchen, dining, bedrooms, bathrooms, basement, back yard.
- A link that doesn’t expire. One link to the folders, not a zip, with a separate full-resolution folder for print.
- Four verticals. Front exterior, kitchen, primary bedroom and the best room, exported vertical so she never crops one herself.
- A text back within the hour. You don’t have to be available. You have to be answerable.
How many photos? Twenty-five to thirty-two on a normal three-bed. Under twenty looks thin. Over forty buries the kitchen behind two hallways. Every MLS board publishes its own upload limit, so look yours up once and save an export preset under it.
Where the files live matters too. A free folder link works, but a delivery site gives her something to send the seller. And agents count mornings, not hours: promise a clock time, not “48 hours.”
One exception: if you shoot for a studio rather than for agents, the handoff runs the other way. Send the original, unedited RAW files, and don’t rename them.
Pricing: what the market pays.
Two public sources, both checked November 18, 2026. These are market figures, not a promise of what you’ll earn.
- Thumbtack
- National average range $185-$343, low end $122, high end $553, “according to Thumbtack data,” last updated October 28, 2026. Thumbtack: real estate photography prices
- PropPhoto
- A standard package is $200 and most fall between $150 and $300, from 684 packages published by 333 photographers, measured August 2026. PropPhoto: how much does real estate photography cost
Both are national figures. Your number depends on your market, your package and how you say it.
Quote a package, never a rate
One number starts a comparison. Three packages on one page end it, because she picks one instead of haggling. How much to charge walks through why. As a published example, Cineminn’s sheet runs $390, $999 and $1,499, with a $149 basic 20-photo shoot kept off the sheet on purpose. The three-package sheet (PDF) has those numbers as the example and blanks for yours.
Two free tools do the math: the package sheet builder turns your prices into a one-page PDF, and the ceiling calculator shows the best week one person can have at your price, drive and editing cost.
What moves the price
- Size. Ask the square footage before you say a number. A bigger house is more rooms, more photos and more time on site. How to quote a 5,000 square foot house.
- Time of day. Twilight has to be shot 20 to 30 minutes after sunset, which pins the booking to one slot. Put it inside your top package rather than on an add-on list. Pricing twilight, floor plans and virtual staging.
- Higher-end listings. Bigger homes and luxury listings need more angles, more details and more editing time, so they sit on a higher line of the sheet. Drone works the same way: aerials inside the package, not an “extra.”
Getting clients.
The photos are the easy part. Getting agents to pay for them is the business. Most photographers don’t have a client problem; they have no weekly routine. Here it is in four steps.
- Build a short list of agents who actually list. Pull the agents in your area with ten or more listings in the last 12 months, not the ones who post the most.
- Send one observation and one small question. About her listing, not about you. No price, no free shoot. The one-observation opener card (PDF) has five openers and two follow-ups.
- Have a portfolio, but don’t wait for a perfect one. Shoot what nobody has to say yes to: exteriors of current listings, empty new construction. And don’t give the photos away free; a free shoot sets your price at zero.
- Keep the ones you get. Delivery, above, is what turns one booking into the next.
Not sure which of these is your problem right now? The free roadmap quiz sorts it out in about two minutes. Everything else that’s free on the site is on the start page, and 82 answered questions cover the business side one question at a time.
Questions people ask.
How much does real estate photography cost?
Thumbtack puts the national average range at $185 to $343 (updated October 28, 2026). PropPhoto measured a $200 standard package in August 2026, with most between $150 and $300. Your price depends on your market and how you package it.
What camera settings do real estate photographers use?
Inside: f/8, ISO 400 or lower, five brackets 2.0 EV apart, 16-17 mm on full frame, on a level tripod with a 2-second timer. Outside: 24 mm, ISO 100, one exposure, slightly under to protect the sky. Bracket outside only when the light is harsh.
Do I need a license to fly a drone for real estate photos?
In the US, yes. The FAA requires a Remote Pilot Certificate under Part 107 to fly for work or business, and each drone flown under Part 107 must be registered.
Should I use a flash for real estate photography?
Not to start. Bracket five frames and blend them instead. Flambient, which adds a flash frame, is a later step once the basics are solid.
How many photos should a listing get?
Twenty-five to thirty-two on a normal three-bedroom house. Under twenty looks thin; over forty buries the best rooms.
How fast should I deliver real estate photos?
Within 24 hours: shoot today, deliver tomorrow morning. If you can’t this week, say so when she books, not after.
Who owns real estate photos, the photographer or the agent?
In the US the photographer usually holds the copyright, and the agent gets a license to use the photos for her listing. Put the license terms in your order page. This is general information, not legal advice.
Will AI replace real estate photographers?
AI takes the editing, not the appointment. Sky swaps and virtual staging are getting cheap. Someone at the house with a tripod while the seller watches is not.
The short version.
Level tripod. Five brackets at f/8. 16-17 mm inside, 24 mm and one exposure outside. Every light on. Four angles a room. Delivered by the next morning, numbered in walk order. Then the part nobody teaches with a camera: a short list of agents who list, one good message, and a package instead of a rate.
Take the settings with you. The card is free.
Take the settings to your next shoot.
The two-sided card, plus a phone version. Set the camera once at the door; after that only the tripod moves.
Sent. Check your inbox for the email from Julian. Want it now? Open the card, or save the phone version.
Outside sources on this page, all opened November 18, 2026:
- FAA, Become a Certificated Remote Pilot
- FAA, Certificated Remote Pilots including Commercial Operators
- FAA, How to Register Your Drone
- FAA, Small Unmanned Aircraft Systems Regulations (Part 107)
- Thumbtack, 2026 Real Estate Photography Prices
- PropPhoto, How Much Does Real Estate Photography Cost? (2026 Data)
- U.S. Small Business Administration, Get business insurance
- U.S. Copyright Office, Copyright in General (FAQ)